Friday, 7 March 2014

How to Root Galaxy Note

How to Root Galaxy Note

I’m not responsible if something goes wrong on your phone(Usually nothing goes wrong), you’re doing this on your own responsibility. Rooting your phone will void your warranty so don’t root your device unless you know what you are doing.To know more about rooting check What is rooting and it’s top 10 benefitsAll these methods WONT trigger the famous yellow triangle. :D
Remember:
You always have to backup your device before proceeding in any of these methods.Luckily,you can check our article about How to Backup Every Android Device
Method1:Rooting via installing an application:
This method is very easy and simple but not recommended because you will have to patch the exploit (the bug) that allowed you to root which Might make your camera stop working but it will also work again after you unpatch the exploit.Also, this will change your phone status to modified. So, only do this if you are sure that you want to root your device easily.
Step1: Download the apk(the application) from Chainfire Original Thread.
d
Galaxy note 1
Step2: After you have finished downloading the app. Install it by going to the directory you download it to, then click on it. If you got this error message  Galaxy note 2
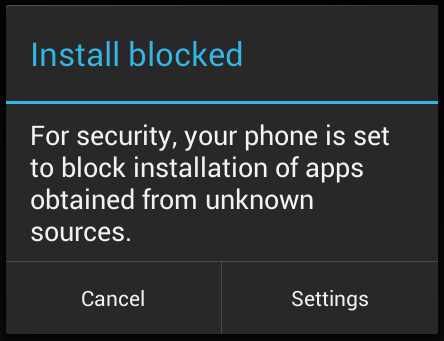
 then Go to Setting-> Security-> Tick “Unknown Sources”
Step3:Now open the app and click “Root device”. As shown.
Galaxy note 3
Step4:Now you will get this screen so click “Grant”.
Galaxy note 4
Step5: Now your device is rooted but,for Security reasons you have to tick “Disable Exploit” &“Disable Exploit on boot”IF you had any issues with the camera then untick these options.
Galaxy note 5
Step6: Now close this app and go to you app drawewhere you will find a new app called SuperSu,click on it and when it opens it
will ask you to update the binary so tab on “Continue”. 
Galaxy note 6
 Hooray You’re ROOTED
OR
 
Method2:
Rooting with Stock Recovery+Safe Kernal +
CWM Recovery: 
[recommended]
Requirements:
1- You will need to download the kernel based on your rom from HERE (Download the .zip file only)You will find the kernel version in the “Setting-> About phone”. Like in the picture.  If you found problems to find your kernel don’t hesitate to ask.
Galaxy note root2
Screenshot
Let’s Start:
Step1:Copy the .zip file to your External SD card
Step2: Now shutdown your galaxy note completely.Then, boot into recovery mode by holding the volume up+ the home button, Now press the power button ONLY for 5 seconds.(Keep pressing the Volume up +Home button after you see your phone model screen) 
Step3:After then you will see the recovery menu,Now choose “install update from External SD”. And choose the .zip file we
downloaded earlier . 
Step4:Then choose yes. Now your phone will install the root. After your phone reboots you should see SuperSu app in your app
drawer.
 
 Hooray You’re ROOTED
 
NOTE:This method will root your phone + install CWM recovery but if you wanted to only root then follow method 3.
OR
Method3:Rooting with Stock Recovery:
NOTE: This method could brick your phone if you wipe your datafactory reset. So,
make sure you don’t wipe data factory reset. Or root using method 2.
Requirements:
1- Download these files:
Let’s Start:
Step1:Copy both files to your External SD card 
Step2: Now shutdown your Galaxy Note completely.Then, boot into recovery mode by holding the volume up+ the home button, Now press the power button ONLY for 5 seconds.(Keep pressing the Volume up +Home button after you see your phone start.)
Step3:After then you will see the recovery menu, Now choose “install update from External SD”. And choose the “Root_SuperSU.0.95-FreeSpace.zip” file we downloaded earlier .And choose yes.
Step4:Now go back to the main recovery menu,Aslo Choose “Install update from External SD” And choose the “Root_Busybox_1.20.2.zip” file we downloaded earlier. After your phone reboots you should see SuperSu app in your app drawer.
Hooray You’re ROOTED

Root HTC Droid DNA

Root HTC Droid DNA


Here is a complete guide for anyone interested in rooting the HTC Droid DNA. The insecure boot image, TWRP recovery, CWM recovery and SuperSU files used in this guide are not my own developments, and their developers have been credited in the end of this post.
I am only writing this as a newbie-friendly guide for everyone, and am providing my own SuperSU, su and busybox installer zip file that includes everything you need for full root.
  1. Unlock the bootloader of your device by visiting the HTC bootloader unlock pageWarning: This will wipe your data.
    UPDATE: Thanks to Verizon, the official bootloader unlocking method mentioned above no longer works. Please refer tothis method for unlocking the bootloader.
  2. Download ClockworkMod or TWRP recovery for the device and rename it to recovery.img (or keep the existing name and change recovery.img in the command below to that name).
  3. Download the SuperSU and busybox package and put it on your SD card.
  4. Put your phone into bootloader mode and connect it to your PC via USB.
  5. On your computer, make sure you are in the folder where you downloaded the recovery file and use this command to flash the recovery:
    Code:
    fastboot flash recovery recovery.img
  6. Finally, reboot your device into recovery, flash the SuperSU and busybox package and reboot your device.

You should now have root access.

Root Samsung Galaxy Note 2

Root Samsung Galaxy Note 2


Introduction:
Today, I will guide you on how you can root your Samsung Galaxy Note 2.This method is the most easiest, safest and the fastest method up to date. To start off, the method will take little time but it’s more guaranteed to work on any Galaxy Note 2.

Disclaimer:
I’m not responsible if something went wrong on your phone(Usually nothing goes wrong), you’re doing this on your own responsibility. Rooting your phone will void your warranty so don’t root your device unless you know what you are doing.To know more about rooting check What is rooting and it’s top 10 benefits. 

Method: Rooting using Odin: [Recommended] 
This method works for almost all Galaxy Note 2s,and it will only root and install busybox.
All credits go for Chainfire for making the CF-autoroot make a look at the Original Thread


Requirements:

1-Download these files:
1-CF-Autoroot Depending on your model number which could be found in Setting-> About Phone:
A) For N7100 Model go HERE.
B) For N7105 Model go HERE.
C) SHV-E250K Model go HERE.
D) SHV-E250L Model go HERE.
E) SHV-E250S Model go HERE.
F) SPH-L900 Model go HERE
G) SGH-I317 Model go HERE
H) SGH-I317M Model go HERE
I) SGH-T889 (T-Mobile version) Model go HERE

IF you didn't see your model number above don't try this method because it might brick your phone.
2-Odin 3.07 From HERE.
3-Samsung USB Drivers from HERE and then install them.
4-Make sure to fully backup your device.Check our post on How to Backup Every Android Mobile Phone.
5-Make sure to backup your EFS file immediately after rooting your device.

Step1:Extract the CF-Autoroot until you got a file with .tar.md5

Step2: Extract odin307.zip then run Odin3 v3.07 as administrator.

Step3:Shutdown your Note 2 completely. Then, hold down the volume down button+ the home button then press the power button for 5 seconds, after you will see a warning screen just press volume up.

Step4: Now click on “PDA” and choose the .tar.md5 file we downloaded earlier. Then connect the USB cable to your computer then to your Galaxy Note 2. Now Click on “Start”.

Step5: Once it successfully finishes you will see “Pass” in the above table of the “ID:COM”


Conclusion:
That's it! Easily rooted. to unroot your device and reclaim your warranty visit How to Un-root Samsung Galaxy Note 2.

Root Galaxy S4 4.4.2

Root Galaxy S4 4.4.2

Disclaimer
I am not responsible if your phone gets bricked, by following the process you are voiding your warranty and significant damage may be caused to your device.
If you are naive enough to screw somewhere, then it is your responsibility.
Software are unpredictable in nature, one may/may not act as predicted especially in case of rooting (personal experience). Hence my friend, treat with ULTRA care.
In short,

I AM NOT RESPONSIBLE FOR ANY DAMAGE TO YOUR PHONE
Step 1: Download Odin on your PC which you need to run on the PC to flash the rooting file.
Step 2: Download the CF Auto Root Package for Android 4.4.2 and extract its file to your PC’s desktop.
Step 3: Now grab your phone, Power it off and press Vol Down+Home+Power buttons till you see the green Android robot. Press the power button again to enter into Download mode.
Step 4: Now run Odin on your PC which you have downloaded in Step 1 and connect your phone to your PC via the USB cable.
Note: Your phone must be in download mode when you connect it with your PC
Step 5: After you have connected your phone, one of the ID:COM devices will turn yellow and your phone’s COM/Port will appear on it. Now click on ‘PDA’ and choose the file ‘CF-Auto-Root-jflte-jfltexx-gti9505.zip’ from your desktop. Also make sure that ‘Auto Reboot’ and ‘F. Reset’ options are checked.
Step 6: Click on the Start Button. The installation will start from Odin and when it is complete your phone will start the process by moving into recovery and the ID:COM box will turn green.
Step 7: After you see the home screen, please remove your phone from your PC. Hurray!! you have rooted!!! :)
Any questions/ideas?? Please comment below..

Root Galaxy S4 LTE

Disclaimer
I am not responsible if your phone gets bricked, by following the process you are voiding your warranty and significant damage may be caused to your device.
If you are naive enough to screw somewhere, then it is your responsibility.
Software are unpredictable in nature, one may/may not act as predicted especially in case of rooting (personal experience). Hence my friend, treat with ULTRA care.
In short,

I AM NOT RESPONSIBLE FOR ANY DAMAGE TO YOUR PHONE

w to Root Galaxy S4 
 Simplified Method
 Just 10 steps
 Tested Method 

Only For 4.2.2 


 It's required to be:
☑ 1| LTE Device
☑ 2| GT-I9505----
----☑ 3| Android 4.2.2


 Download and extract The Root file

 Make sure that your phone is powered off

 click and hold on [Power + volume Down + Home]


 when the previous image apears on your device Click on [volume up] to continue 


 On your PC open the the root file

 Open [Odin3 v3.04.exe]

 Click on [PDA] then choose [CF-Auto-Root-jflte-jfltexx-gti9505.tar.md5]

 Connect your phone to the PC

 Click on start then wait 5sec


 Keep your phone (it will reboot twice)


 Enjoy, Your phone is now Rooted 

Sunday, 29 December 2013

Root the Tesco hudl

Rooting Hudl
This works for a Windows 7 computer and may work with others

Disclaimer
I am not responsible if your phone gets bricked, by following the process you are voiding your warranty and significant damage may be caused to your device.
If you are naive enough to screw somewhere, then it is your responsibility.
Software are unpredictable in nature, one may/may not act as predicted especially in case of rooting (personal experience). Hence my friend, treat with ULTRA care.
In short,

I AM NOT RESPONSIBLE FOR ANY DAMAGE TO YOUR PHONE


All procedures were done under WINDOWS 7, 32-bit and 64 -bit
(Please Read Through Before Starting Any Process)

This is the adb file you need to install on a windows computer.
Right click 'Here'
Chose 'Save target as' and down load the file
Go to the file and rename it as UniveralAdbDriverSetup.msi which you have just installed and double click to install it.
This enables your computer to talk to an Android device
Down load the program Kingo from this web site www.kingoapp.com
Go to your Hudl and enable USB debugging by going to Settings/About Tablet/ double click 'Build Number'. Then go back to the System page where devloper options will now be on the menu
At 'USB debugging, click to enable. If you are not sure of this bit, when you run the rooting program it will prompt you
Click on the large green box 'Download and install the program and run it.
Follow the on screen instructions. You can use the cable which came with the Hudl as the USB cable to commect to your computer
After a few minutes you will have a rooted Hudl! There are apps in the app store to test it

Sunday, 18 September 2011

Don’t have a Touch Screen for Windows 8?

Don’t have a touch screen for the complete experience of the Metro UI on Windows 8. In Windows 8 there is a tool that can be used to simulate a tablet and most of the touch features in windows 8. To use the "Windows Simulator" just go directly to it and execute it from the following location.

\Program Files (x86)\Common Files\Microsoft Shared\Windows Simulator\Microsoft.Windows.Simulator.exe“.

This will allow you to use touch features including single touch, zoom gestures and the rotation gesture using the mouse in Windows 8 Developer Preview build.


There is also very useful download for people using Windows 8 on a PC without a touch screen. It allows you to toggle between the Metro Start screen and the Classic start menu in Windows 8 Developer Preview.WINDOWS 8 ONLY. RUN AS ADMIN. (Win 8 may require you to download and install the .Net 3.5.1 runtimes)


 To Download  http://www.deviantart.com/download/258422929/windows_8_start_menu_toggle_by_solo_dev-d49uwep.zip